
Why Underwater Photos Look Blue (and How to Fix Them)

You're hovering over a reef that's lit up with color. Bright orange clownfish tucked into purple anemones, neon yellow tangs cruising past pink sea fans, a parrotfish so green it almost glows. You're firing off photos the entire dive because how could you not. Then you surface, scroll through your camera roll, and every single shot looks like it was filtered through a swimming pool. Flat, blue, lifeless. Nothing like what you just saw with your own eyes ten minutes ago.
You're not doing anything wrong, and there's nothing wrong with your camera. Water itself is stealing your color, and it starts doing it a lot shallower than most people realize. Once you understand why underwater photos look blue, fixing it is pretty straightforward.

Why Color Disappears Underwater in the First Place
Sunlight looks white, but it's really a mix of every color in the spectrum, and each color travels through water differently. Water absorbs the longer wavelengths first: reds, oranges, and yellows. Blue and green sit on the shorter end of the spectrum, so they travel further before the water swallows them too. That's the entire reason everything underwater trends blue or green the deeper you go. It's not your eyes, and it's not your gear. It's physics doing exactly what physics does.
Here's roughly how it plays out as you descend:
Around 10 meters (30 feet): red starts fading out.
By about 18 meters (50 feet): red, orange, and yellow are essentially gone.
By the time you're shooting at a normal recreational depth, your camera is only receiving a slice of the color that was actually present at the surface. That's your flat blue photo, straight out of the camera, before you've touched a single setting.
Fixing It at the Source: Red Filters
A red filter works by canceling out some of the excess blue-green light hitting your lens, which brings the warm tones back into balance right at the moment of capture. It's the most direct fix there is, because you're correcting the problem before it ever reaches your camera roll instead of trying to rebuild color that was never recorded.
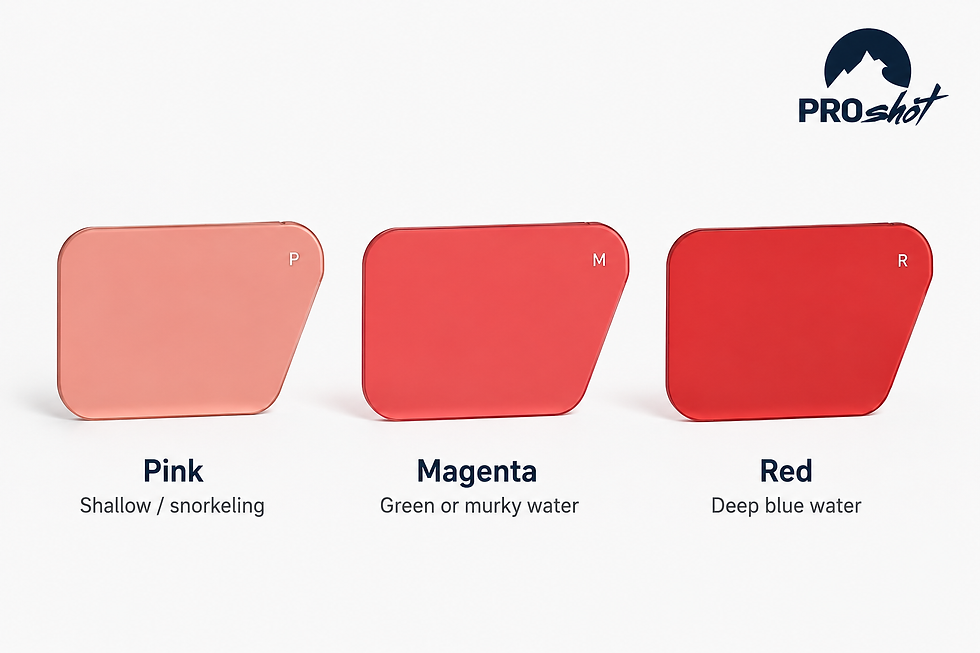
Water conditions vary enough that one filter color won't cover every dive, so here's how to match filter to conditions:
Red filter: built for diving 7.5+ meters (25+ feet) in blue water.
Magenta filter: built for diving 7.5+ meters (25+ feet) in green or murkier water.
Pink filter: built for snorkeling and shallow water, where color loss is much milder.
One thing to know before you buy: filters are matched to your device type. The iPhone filter pack fits both the ProShot Dive Case and Touch 2.0 for iPhone, and the Android filter pack fits both the Dive and Touch for Android. They're not interchangeable between iPhone and Android though, so make sure you're grabbing the right one for your phone.
It's Not Just About the Filter: Shooting Habits That Matter Just as Much
A filter solves color. It doesn't solve everything working against you underwater, and a few habits make a genuinely bigger difference than most people expect walking in.
Get Close to Your Subject
Every foot of water between your lens and your subject adds more color loss and more particles for light to scatter off before it reaches your camera. Getting physically closer, rather than zooming, cuts down on both problems at once. A good habit: get closer than feels necessary, then close the gap a little more.
Use Natural Light on Purpose
Shoot with the sun at your back rather than facing into it, and you'll keep more usable natural light falling on your subject while cutting down on backscatter, those bright distracting specks that show up when light bounces off particles suspended in the water. Midday sun tends to give you the most usable light for photography, since it has the shortest, most direct path down through the water column.
Time Your Dive Around the Light
Late morning through early afternoon gives you the strongest, most direct sunlight for natural-light photography. Early morning and late afternoon dives look beautiful to the eye but leave your camera working with a lot less to capture, so plan your photography-focused dives around that window when you can.
Watch Your Buoyancy
Kicked-up sand and silt ruin visibility fast, both for your shot and for anyone diving near you. Solid buoyancy control keeps you from disturbing the bottom and gives you steadier framing, which matters more than people expect once you're trying to hold a shot for more than a second.
Consider a Dive Light for Deeper or Darker Shots
Past a certain depth, or in low-light conditions like overcast days, wrecks, and caverns, a dive light restores color close to your subject the way a filter restores it across the whole frame. Divers shooting in those conditions often run a dive light and a red filter together for the best combined result.
Post-Processing: Bringing the Rest of It Home
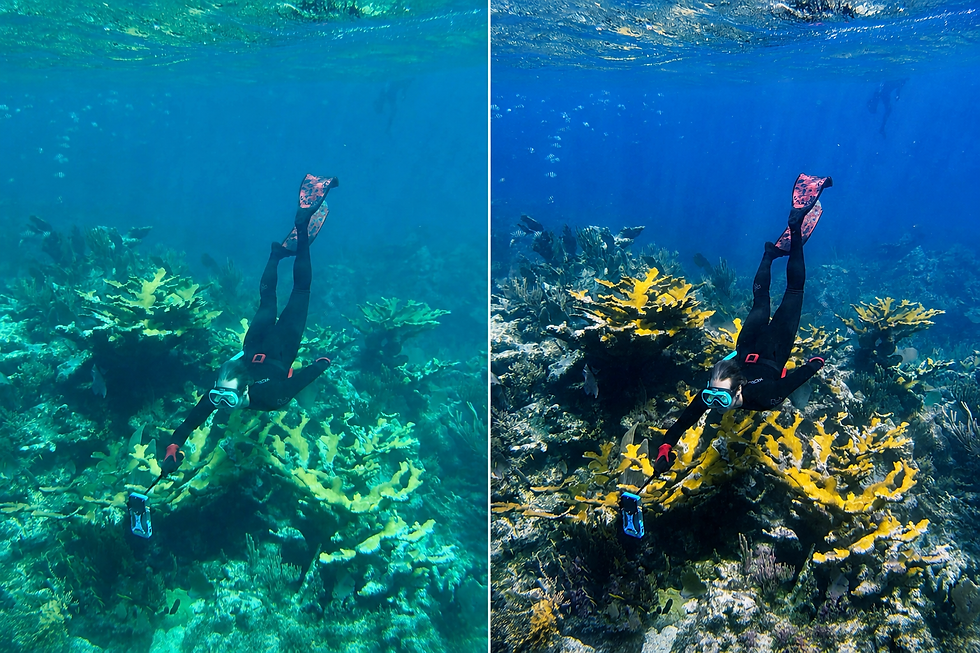
Even with a filter, a little editing afterward finishes the job. Here's where to start:
Adjust white balance first. This single step usually fixes more of the blue or green cast than anything else you'll do in editing. Plenty of apps handle this well, including the color-correction tools built directly into the ProShotCase app for footage shot on a ProShotCase.
Bring warmth back gradually. Push reds and oranges up in small steps rather than all at once. Overcorrect and you'll end up with orange skin tones and coral that looks artificially warm instead of natural.
Fix contrast before you touch saturation. Underwater shots usually read as flat rather than undersaturated. Correct contrast first, then add a modest saturation boost on top, and the result reads far more natural than cranking saturation by itself.
Know when editing can't save the shot. Past a certain depth, the color information genuinely isn't in the file anymore, and no amount of editing pulls back what was never recorded. That's the entire argument for correcting with a filter (or lighting) at the time you shoot, rather than hoping to fix it later on a laptop.
Common Mistakes to Avoid
These are the ones we see over and over again, and every single one of them is an easy fix once you know what to look for.
Using a red filter in shallow water. In the first few meters there's still plenty of natural warm light, and a red filter here overcorrects, leaving everything with an unnatural red cast.
Assuming every filter fits every case. Confirm your case and device combination before buying. A mismatched filter won't fit, full stop.
Zooming instead of moving closer. Zoom, optical or digital, doesn't reduce the water between you and your subject, so it does nothing for color loss the way physically closing the distance does.
Shooting straight down instead of angling upward. Angling slightly upward toward your subject, with natural light behind it, tends to produce far more dynamic, colorful results than shooting flat or downward into open water.
Ignoring backscatter until it's too late. Position yourself so ambient light or your dive light isn't bouncing straight back into the lens off suspended particles. A little repositioning before the shot saves a lot of editing after it.
Frequently Asked Questions
Do I need a red filter for snorkeling?
Usually not. For shallow snorkeling, a pink filter (or no filter at all in bright, shallow water) does the job. Red filters are built for deeper diving in blue water, where the color loss is far more severe.
Can I fix blue underwater photos entirely with editing, no filter needed?
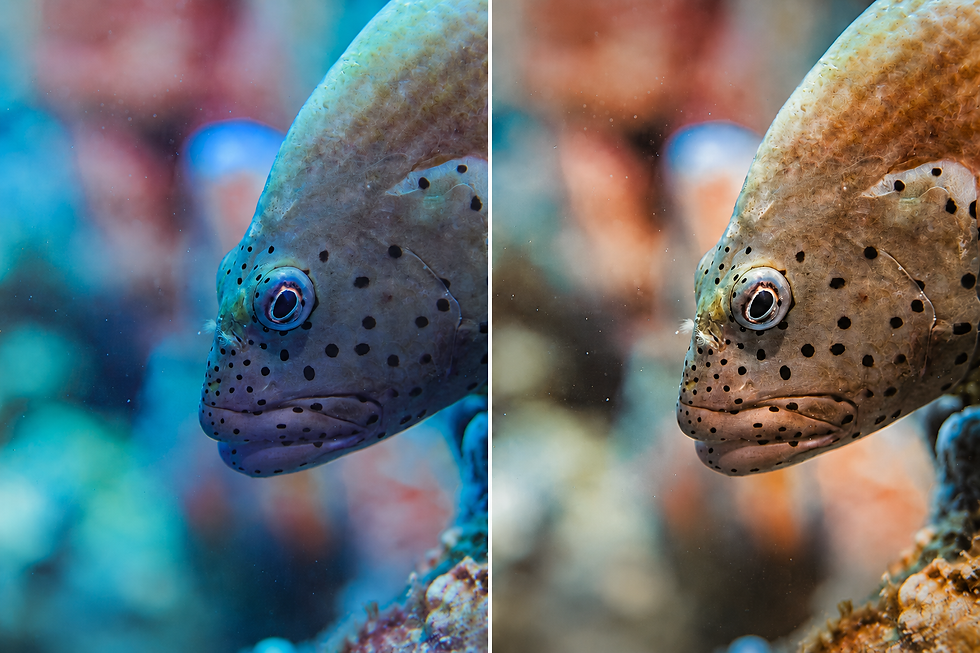
Partially, and only up to a point. White balance adjustments handle a lot in shallow-to-moderate depths. Past a certain depth, the color data simply isn't in the image file, so a filter used at the time of shooting will always outperform an edit made afterward.
Does a dive light replace the need for a filter?
No, they solve different problems. A light adds brightness and restores color close to the light source, while a filter corrects color balance across the whole frame. Many photographers run both together, especially in darker conditions like wrecks or night dives.
Why do my photos look blue even in clear tropical water?
Clarity and color loss are two different things. Clear water lets you see further, but the water itself is still absorbing red, orange, and yellow wavelengths as you descend, regardless of how clear it looks. Gin-clear water at 20 meters still loses warm tones the same way murkier water does.
Should I shoot in RAW format for underwater photography?
If your phone or camera supports it, yes. RAW files hold onto far more color and exposure data than a standard JPEG, which gives you a lot more room to correct white balance and recover detail afterward without the image falling apart.
What's the difference between a red filter and manually adjusting white balance on my camera?
A red filter corrects color optically, before the light ever hits your sensor. Manual white balance is a software adjustment happening after the image is already captured. Using a filter at capture time generally produces a cleaner, more natural result than trying to push white balance to compensate for color the camera never recorded.
Do filters work the same way at every depth
No. A red filter calibrated for 25+ feet in blue water will look different, and potentially over-correct, at much shallower depths where natural light hasn't lost as much color yet. Match your filter choice to your actual dive depth and conditions rather than leaving it on for an entire dive regardless of depth changes.
Go Get Your Colors Back
Now that you know why underwater photos look blue, the fix comes down to three things: match the right filter to your depth and water conditions, build a few habits around light and distance, and let a quick edit finish the job afterward. That flat blue cast isn't something you have to live with, and you definitely don't need a thousand-dollar camera setup to fix it.
If you're shooting with a smartphone housing, our Red Filter 3-Pack is built to cover the full range of conditions: red for deep blue water, magenta for green or murky water, and pink for snorkeling and shallows. Pair it with any ProShotCase, and you're correcting color at the point of capture instead of fighting with it on a screen later.


Comments